Starting a blog is one of the best things you can do to share your passion, build an audience, and even make money online. But if you are a complete beginner, the initial step of setting up a website can feel incredibly overwhelming. You might be thinking: “I’m not a tech person. How can I possibly build a professional-looking website?“
Don’t worry. You are not alone. Almost every successful blogger today started exactly where you are right now—feeling stuck and confused.
This guide is not about technical jargon or coding. This is about blogging for beginners made simple. We will focus on a step-by-step website setup for new bloggers that is easy to follow and costs very little.
Let’s break it down into easy, manageable steps.
What Do You Actually Need to Start a Blog?
Before we dive into the setup, it’s crucial to understand the essential components. You can think of your blog like a real-world shop.
1. A Niche (Your Shop’s Topic): What are you going to sell (or write about)?
2. A Domain Name (Your Address): How will people find your shop? (e.g., www.yourblogname.com)
3. A Web Hosting (Your Shop Space): Where are you storing all your blog’s files and pictures?
4. A Content Management System (Your Shop Staff): How will you manage and manage your shop without building it from scratch? (We will use WordPress).
That’s it. Everything else is just styling and decoration.
Step 1: Find Your Blog’s Niche (The ‘Why’)
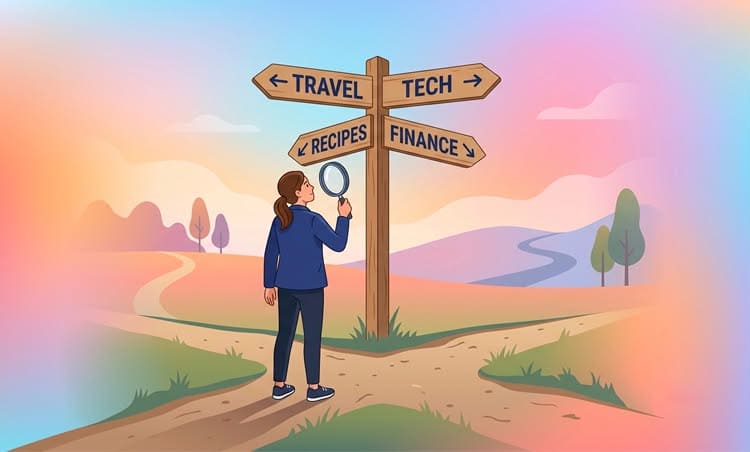
This is the most critical step, even though it’s not technical. Most beginner blogs fail because they try to write about everything: news, food, travel, tech, fashion—all on one site.
A “niche” is simply a specific topic you focus on. When you focus on a specific audience, Google learns to trust your blog as an authority on that topic.
If you’re still on the fence about setting up a domain and hosting right now, you can also check out my guide on how to start affiliate marketing without a website to get a feel for online earnings first.
Easy Ways to Launch Your First Blog Niche
Follow Your Passion: If you love cooking, don’t write about football. You will run out of ideas fast. What do you talk about for hours with friends?
Solve a Problem: Do you know how to build budget PCs? Or how to train dogs? Write articles that solve people’s problems.
Keep It Specific: Instead of “Food Blog,” try “Vegan Recipes for Busy Moms.” Instead of “Tech,” try “Smart Home Device Reviews.”
Step 2: Choose Your Domain Name (Your Digital Address)
Your domain name is your brand on the internet. It’s what people type into their browsers to find you. This is a crucial part of the website setup for new bloggers.
How to Pick the Perfect Domain:
- Go with .com: It’s the most trusted and easy to remember.
- Keep It Short: People should be able to type it easily without mistakes.
- Avoid Hyphens and Numbers: bestsomeone23.com is bad; someonestips.com is good.
- Make It Easy to Spell: If you have to spell it out loud, it might be too complicated.
- Think Ahead: Choose a name that leaves room to grow.
Once you have a name idea, you can check if it’s available using any domain registrar (we will get it for free with our hosting, which is much better for beginners).
Step 3: Get Web Hosting (The Foundation)
This is where your website actually lives. When you are looking for easy ways to launch your first blog, the smartest move is to choose a reliable and beginner-friendly hosting provider.
We strongly recommend starting with WordPress.org, not the free WordPress.com version. Why? Because WordPress.org (the self-hosted version) gives you full control over your site, allows you to show ads to make money, and lets you install powerful plugins.
For this guide, we recommend using popular, affordable options like Hostinger, Bluehost, or GreenGeeks. They are fast, reliable, and come with one crucial feature: one-click WordPress installation.
Special Beginner Tip: Most of these hosting companies will give you a free domain name for the first year if you sign up for their hosting plan! This is a great way to save money.
Step 4: Step-by-Step WordPress Website Setup
This is where the magic happens. Don’t be afraid—the technical stuff is actually quite simple now.
Part 1: Purchase Hosting and Your Free Domain
Go to your chosen hosting provider (e.g., Hostinger).
Choose their basic shared hosting plan (this is enough for starting).
During the sign-up process, you will see an option like “Claim a Free Domain.” Enter the domain name you picked in Step 2.
Complete the payment process. You are now a website owner!
Part 2: Install WordPress (The One-Click Magic)
Once you log in to your new hosting account (often called ‘hPanel’ or ‘cPanel’), you will see a huge dashboard. Ignore the 100+ buttons.
Look for an option called “Auto Installer,” “Website Builder,” or simply “WordPress.” Click on it.
A simple setup wizard will guide you. It will ask for:
Website Title: (e.g., “Sarah’s Vegan Kitchen”)
Admin Username: (Use something secure, not ‘admin’)
Admin Password: (Make it strong!)
Click “Install.”
Wait for a minute or two. Your hosting is now working behind the scenes to install all the WordPress files for you.
That’s it! Your website setup is complete. You didn’t write a single line of code.
Step 5: Master Your WordPress Dashboard (The Control Room)
Now that WordPress is installed, you need to log in to the back-end of your site to manage everything.
To log in, type your domain name followed by /wp-admin (e.g., www.yourblogname.com/wp-admin). Enter the username and password you created in the last step.
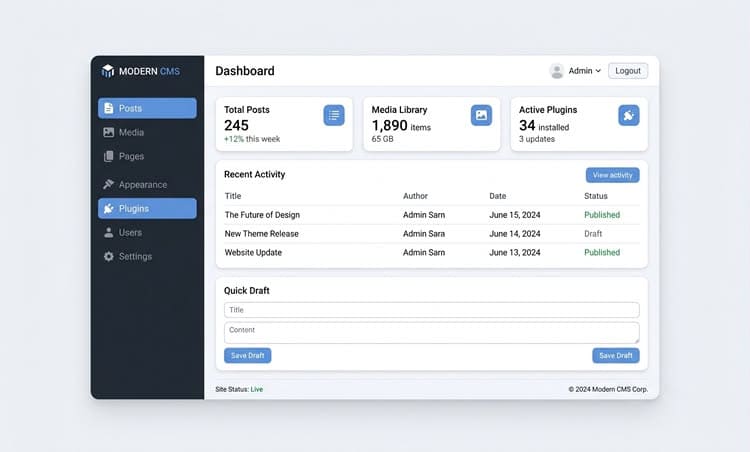
Welcome to your WordPress Dashboard. It looks clean and powerful. Here is a quick look at the most important parts for blogging for beginners:
Posts: This is where you will write all your blog articles.
Media: All your uploaded photos and videos live here.
Pages: Use this for permanent pages like your “About Me,” “Contact,” and “Privacy Policy” (all essential).
Appearance: This is where you control how your site looks (themes).
Plugins: These are like apps for your website that add new features.
Step 6: Choose a Theme (Design Your Blog)
Your blog’s design is the first impression. But here is the best advice for complete beginners: Keep it simple.
Many new bloggers get trapped trying to pick the perfect theme or spending weeks on the colors. In the beginning, readability and loading speed are infinitely more important than fancy animations.
Go to Appearance > Themes > Add New.
In the search bar, look for “lightweight” themes. We highly recommend starting with:
GeneratePress
Astra
Kadence
Click “Install” and then “Activate.”
These themes are designed to load super fast and have a clean, professional look right out of the box. They are also very easy to customize later when you know more about WordPress.
Step 7: Write and Publish Your First Blog Post
This is the most important step after the initial website setup. You are finally creating the content that will bring visitors to your site.
The Best Blogging Tips for Complete Beginners for Writing Posts:
Use Clear Headings: Break your post into logical sections using H2 and H3 tags. This makes it easy for readers and search engines to scan your content.
Write Simply: Pretend you are talking to a friend. Use plain English. Avoid complicated words just to sound smart.
Keep Paragraphs Short: 2-3 sentences max per paragraph. This keeps the reader engaged and stops them from feeling overwhelmed by a wall of text.
Add Images: Visuals are essential to break up the text and illustrate your points.
Ready to publish?
Go to Posts > Add New.
Give your post a title.
Write your content.
Add a feature image (the main image for your post).
Click Publish!
Summary and Final Checklist
Starting a blog is a journey, not a sprint. The initial step-by-step website setup for new bloggers might take you a few hours or an afternoon, but once it’s done, you are officially in business.
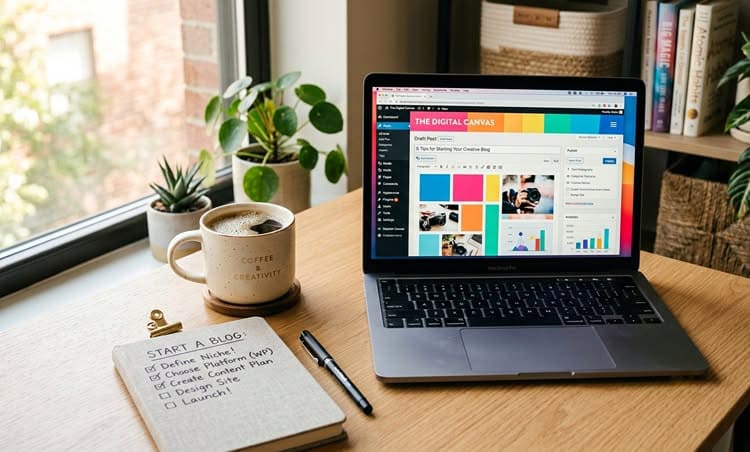
Here is your quick checklist of the easy ways to launch your first blog we covered:
- Pick your niche.
- Register your domain and get hosting (remember the free domain trick!).
- Install WordPress.
- Activate a simple, lightweight theme like Astra or GeneratePress.
- Write and publish your first post.
Don’t obsess over perfection. Your first few posts don’t need to be perfect. Just get them out there. Keep learning, keep writing, and your blog will naturally improve over time.
Welcome to the world of blogging! We can’t wait to read what you