
Have you noticed that some Pinterest Pins show extra information from the website, such as the article title or description? These are called Rich Pins.
For bloggers, Rich Pins can make your content easier for Pinterest to understand and connect the Pin with your website content. The good news is that WordPress users can prepare their site for Rich Pins without writing code.
In this guide, you’ll learn how to enable Rich Pins on WordPress using Yoast SEO in a few simple steps.
Enable Rich Pins on WordPress Using Yoast SEO
What Are Pinterest Rich Pins?

Rich Pins automatically pull information from the webpage linked to your Pin.
For example, Article Rich Pins can use information such as your article title, description, and article type.
Pinterest says Article Rich Pins can use Open Graph or Schema.org markup to read information from your website.
Source: Pinterest — Create Rich Pins
If you run a blog, Article Rich Pins are the type you’ll most likely want to use.
Do You Need Yoast SEO for Rich Pins?
No. Yoast SEO isn’t required for Rich Pins.
However, Yoast makes it easier for WordPress users because it can generate Open Graph and Schema data for your website without manually adding code.
Yoast also has an official guide specifically about setting up Pinterest Rich Pins.
Source: Yoast
Step 1: Install Yoast SEO
If you already have Yoast SEO installed, skip this step.
Otherwise:
- Open your WordPress Dashboard.
- Go to Plugins → Add New Plugin.
- Search for Yoast SEO.
- Click Install Now.
- Click Activate.
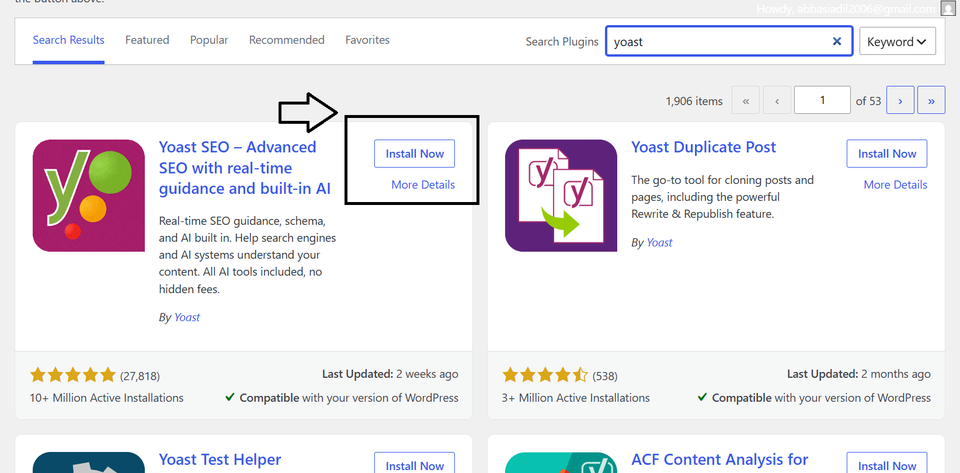
Step 2: Turn On Open Graph Data
This is the main Yoast setting you need to check.
Go to:
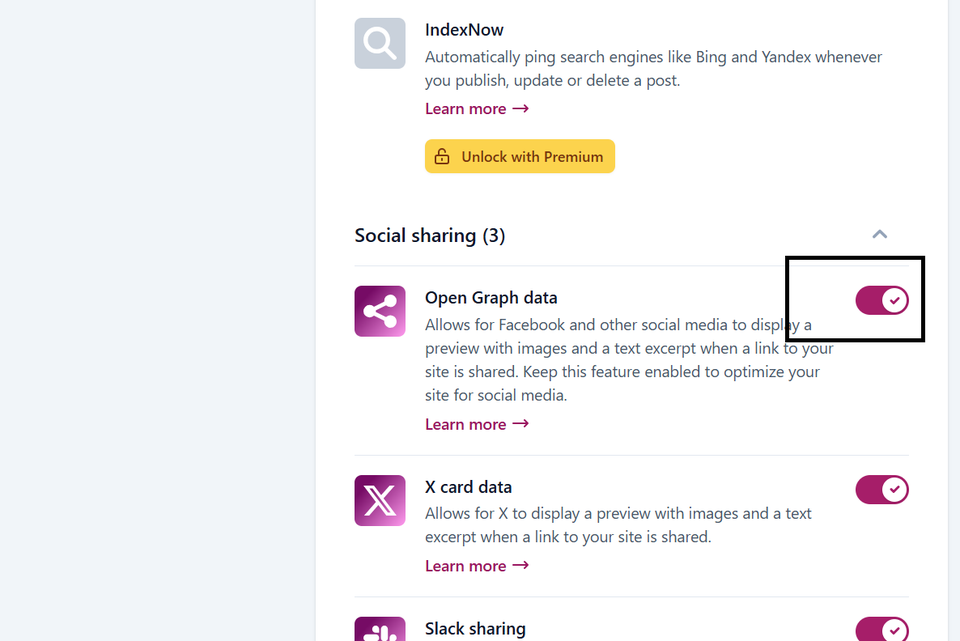
Yoast SEO → Settings → Site features → Social sharing
Find Open Graph data and make sure it is turned ON.
Yoast’s official documentation confirms that Open Graph data can be enabled from the Social sharing section of its settings.
Source: Yoast — Open Graph meta tags
Why Is Open Graph Important?
Open Graph metadata gives platforms information about your webpage, such as its title, description, and image.
Pinterest can use this information when processing Rich Pins.
Source: Pinterest — Create Rich Pins
Step 3: Check Your Schema Settings
Yoast also recommends checking your site’s standard Schema output when setting up Pinterest Rich Pins.
Go to:
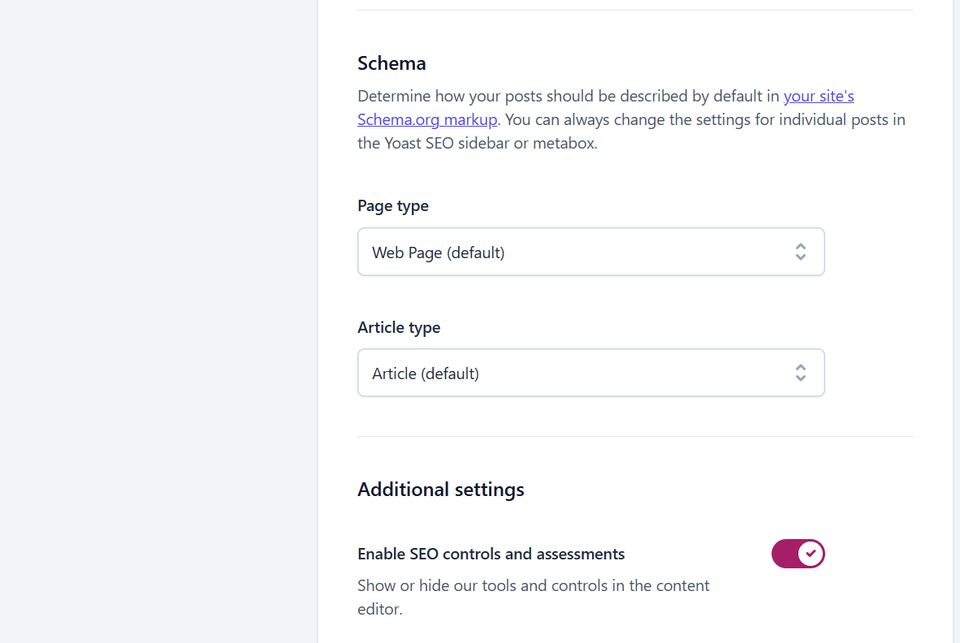
Yoast SEO → Settings → Content types
Open the settings for your blog posts and make sure you haven’t disabled the standard Schema output.
You normally don’t need to add Schema code yourself. Yoast handles the structured data for you.
Source: Yoast
Step 4: Check Your Blog Post
Now open one of your published blog posts.
Make sure it has:
- A clear title
- A useful description
- A relevant featured image
- Accurate article information
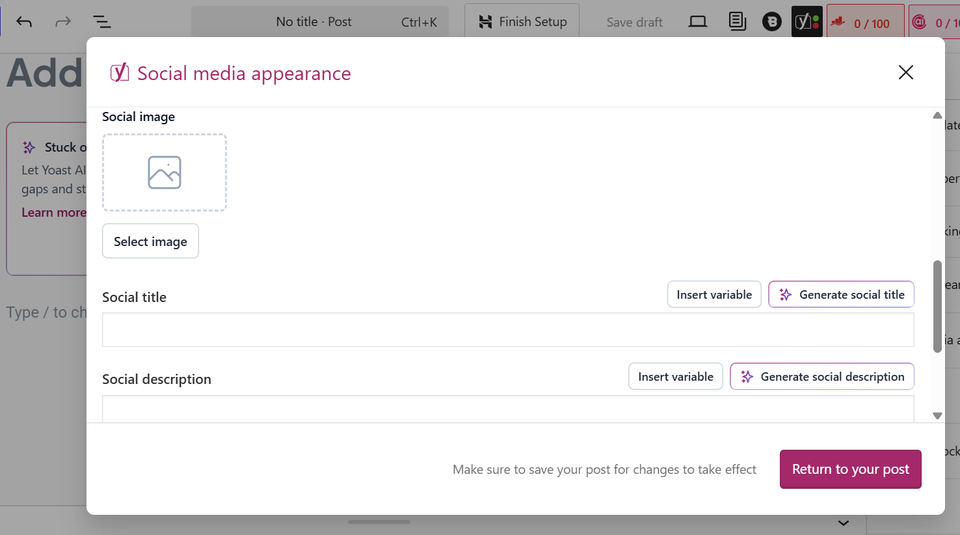
Yoast also lets you customise how your content appears when shared on social platforms.
Source: Yoast — Custom Open Graph tags
Step 5: Claim Your Website on Pinterest
Claiming your website is separate from the Rich Pins metadata setup, but it’s a useful step for bloggers.
In Pinterest:
Settings → Claimed accounts → Claim your website
Then follow Pinterest’s verification instructions.
Source: Pinterest — Claim your website
Remember, claiming your website and setting up Rich Pins are not the same thing. Rich Pins depend on the correct metadata being available on your website.
Why Aren’t My Rich Pins Showing?
If your Pins don’t show Rich Pin information immediately, check these things:
Open Graph Is Disabled
Go back to:
Yoast SEO → Settings → Site features → Social sharing
and make sure Open Graph data is enabled.
Another Plugin Is Creating Open Graph Tags
If another SEO or social plugin is also generating Open Graph metadata, you may have duplicate tags. Check your plugins and avoid having multiple tools generate the same data.
Your Cache Is Outdated
Clear your WordPress, hosting, CDN, and browser cache after changing your settings.
Pinterest Hasn’t Updated Yet
Pinterest may need some time to process changes to your website’s metadata, so don’t worry if the information doesn’t appear instantly.
Also If your pins are validated but you notice a sudden drop in impressions or reach, your account might be caught in Pinterest’s automated spam filters.
To make sure your account stays in good standing, check out our guide on How to know if you are shadowbanned on Pinterest
Do Rich Pins Increase Pinterest Traffic?
Rich Pins can make your content more informative and help Pinterest understand your website content, but they aren’t a guaranteed traffic boost.
Your results still depend on things like:
- Pinterest SEO
- Keyword targeting
- Pin design
- Content quality
- Your niche
- Click-worthy titles
So, think of Rich Pins as one useful part of your Pinterest strategy, not a magic traffic trick.
Final Thoughts
Setting up Rich Pins on WordPress is easier than it may seem. If you’re using Yoast SEO, start by turning on Open Graph data and checking your standard Schema output.
After that, make sure your blog posts have clear titles, descriptions, and relevant images, then claim your website on Pinterest.
That’s it. You don’t need complicated coding or a developer to get your WordPress site ready for Pinterest Rich Pins.
Did your site validate on the first try, or are you running into a stubborn error message? Drop a comment below and let me know—I’d be happy to help you troubleshoot!